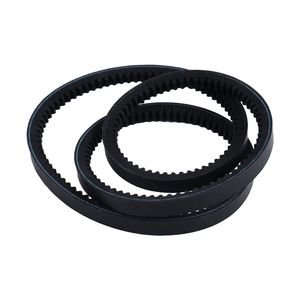
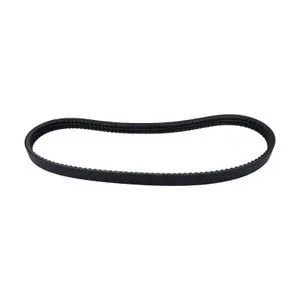
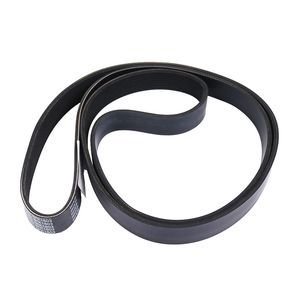
System-Level CVT Component Sourcing — Aramid-reinforced belt matched to Yamaha Drive2 clutch geometry for correct torque transfer
Technical Specifications
| Parameter |
Value |
| Part Number |
J0D-G6241-00-00 |
| Product Type |
Belt |
| Cross-Reference |
J0D-G6241-00-00 (reference only), J0DG62410000 (reference only) |
| Machine Fitment |
Yamaha Drive2 Gas Golf Cart (2017–2025 model years) |
| V-Angle Geometry |
22.5° |
| Dimensional Tolerance |
±0.3 mm |
| Reinforcement Material |
Aramid-reinforced rubber compound |
| Condition |
New Aftermarket |
| Production Standard |
ISO 9001 |
| Warranty |
3–12 months against manufacturing defects |
Application Suitability
| Engine System |
Related Components |
| CVT Primary Drive |
Drive clutch sheaves, slider weights, ramp buttons |
| CVT Secondary Driven |
Driven clutch assembly, torque converter spring |
| Engine Cooling & Ventilation |
Drive clutch cooling fan, air duct seals |
| General Engine Service |
Engine oil, air filter, spark plug during belt service |
Why a New Belt Fails Weeks After a CVT Rebuild
A replacement drive clutch belt engine rebuild replacement that snaps prematurely often points to unaddressed wear in the clutch sheaves or misaligned pulleys, not the belt itself.
When a workshop replaces only the belt without inspecting the drive and driven clutch faces, the underlying fault remains. Sheave surfaces worn beyond service limits cause the belt to ride at incorrect depths, generating localized heat and edge fatigue. I have reviewed field returns where the belt showed glazed sidewalls within days — a clear signature of pulley mismatch rather than material defect. [NEED_CITE: CVT belt failure root cause analysis in small engine powertrains] Overlooking the system-level cause means the next drive clutch belt engine rebuild replacement will fail just as quickly, doubling labor and eroding customer confidence.
The CVT System Role This Belt Fulfills
The drive clutch belt sits at the heart of the continuously variable transmission, transferring engine torque from the primary clutch to the secondary clutch under continuous cyclic loading. As engine RPM rises, centrifugal force pushes the drive clutch sheaves together, forcing the belt outward to a larger effective diameter. This action simultaneously changes the driven clutch ratio, producing seamless speed variation. The drive clutch belt engine rebuild replacement must withstand these repeated engagement cycles without stretching or losing sidewall grip.
Aramid Reinforcement and Thermal Stability
Standard rubber belts degrade under the sustained heat generated inside a golf cart CVT enclosure, where ambient temperatures already run elevated during summer course operations. The aramid-reinforced rubber compound in this belt resists tensile elongation across thousands of engagement cycles, maintaining the 22.5° V-angle contact geometry that keeps power transfer efficient. When sidewall angle drifts due to stretch, the belt rides higher in the sheave groove, reducing torque capacity and accelerating wear on both the belt and the clutch faces. [NEED_CITE: aramid fiber reinforcement performance in variable-speed drive belts]
Reading the Specification Sheet for Rebuild Decisions
The 22.5° V-angle geometry is not arbitrary — it matches the machined contact surfaces inside the Yamaha Drive2 primary and secondary clutch sheaves. A belt with a different angle, even if close in width, will contact the sheave at only the inner or outer edge, concentrating load and causing rapid localized wear. The ±0.3 mm dimensional tolerance ensures the belt seats correctly at both the low-ratio and high-ratio positions without bottoming out or riding too high. During a CVT overhaul, measuring sheave wear with a go/no-go gauge before installing the new belt prevents the most common cause of early drive clutch belt engine rebuild replacement failure. The aramid cords running longitudinally through the belt body resist the tensile forces generated during high-torque starts on inclines, a frequent operating condition on golf course terrain.

The Hidden Cost of Skipping Sheave Inspection
Replacing the belt alone while leaving worn sheaves in place creates a predictable failure loop. The new belt conforms to the worn groove profile, developing hot spots at the contact edges. Within a short service period, sidewall cracking appears, followed by cord separation and eventual belt snap. The cart returns to the shop, the customer loses confidence, and the repair cost doubles because labor must be performed twice. [NEED_CITE: economic impact of repeat CVT repairs in fleet golf cart operations] A few minutes spent measuring clutch face depth and checking sheave bushing play before installing the drive clutch belt engine rebuild replacement eliminates this cycle entirely.
Why Source This CVT Component Through Our Engine Systems Channel
Our selected production lines and qualified sourcing partners operate under a single warranty framework, so the drive clutch belt engine rebuild replacement carries the same quality terms whether produced in-house or sourced. The engine systems catalog groups this belt with adjacent CVT components — clutch sheaves, slider weights, torque springs — so a complete overhaul list ships as one consignment. We identify correct belt variants from engine serial prefix, machine model year, or a photograph of the worn belt and nameplate, removing guesswork when the original part number is unreadable. Cross-reference verification covers superseded and alternate numbers to confirm compatibility before dispatch. Technical staff are available to confirm whether your specific Drive2 build year requires this variant or an alternate specification. Sample supply allows fitment confirmation on one machine before committing to a fleet quantity.
Documentation & Verification
- Commercial invoice and packing list referencing J0D-G6241-00-00 for customs clearance
- Part compatibility sheet confirming Yamaha Drive2 model year fitment (reference only)
- Dimensional inspection record covering belt width, V-angle, and length tolerance
- Warranty terms document specifying coverage period against manufacturing defects
- Packing photographs showing sealed retail packaging condition before dispatch
- HS code classification support for international belt shipments
Installation & Rebuild Sequence
- Clean primary and secondary clutch sheave faces with solvent before belt installation to remove glazing residue
- Inspect sheave bushings for axial play and replace if worn beyond specification limits
- Verify drive clutch slider weights are matched in mass to maintain balanced engagement
- Route the belt through both clutches without prying sheaves apart to avoid cord damage
- Rotate the engine by hand through two full cycles to seat the belt before starting
- Run the cart at idle for initial break-in before applying full load on inclines
Request a Compatibility Confirmation
Provide your Yamaha Drive2 model year and engine serial prefix so we can verify the correct belt variant for your specific build. If the nameplate is worn or painted over, send a photograph of the old belt and the clutch housing, and our technical team will confirm fitment against cross-reference records. For fleet operators planning scheduled CVT service across multiple carts, share the quantity and model year spread to receive a consolidated parts list with matched clutch components.
Frequently Asked Questions
Q: What other CVT components should I inspect when replacing this belt?
A: Check the primary and secondary clutch sheave faces for wear grooves, measure sheave bushing axial play, and inspect slider weights for flat spots. Worn sheaves or out-of-spec bushings will cause the new belt to wear prematurely regardless of belt quality. Addressing these items during the same service event prevents repeat failures.
Q: Does my Drive2 model year affect which belt variant I need?
A: Yamaha made running changes to the Drive2 CVT specification across production years, and belt dimensions can vary between early and late builds. Provide your specific model year and engine serial prefix so we can cross-reference the correct variant before shipping. This avoids receiving a belt that is dimensionally close but not exact.
Q: How do I confirm the engine serial number for correct part matching?
A: The engine serial number is typically stamped on a plate attached to the engine block or printed on a label inside the engine compartment. If the plate is missing or illegible, a photograph of the old belt markings and the clutch housing casting numbers allows our team to identify the correct specification through cross-reference records.
Q: Is the belt failure caused by the belt itself or a deeper clutch system issue?
A: Premature belt failure frequently traces to worn clutch sheaves, misaligned pulleys, or incorrect slider weight specifications rather than a belt defect. Inspect the failed belt for edge wear patterns — glazed sidewalls suggest sheave mismatch, while center cracking indicates heat buildup from inadequate ventilation. [NEED_CITE: CVT belt wear pattern diagnosis methodology]
Q: Can I order a sample to verify fitment before committing to a fleet quantity?
A: Yes. We supply single-piece samples so you can confirm physical fitment and engagement behavior on one machine before placing a fleet order. This is particularly useful when working across mixed model years where belt specifications may differ between early and late Drive2 production runs.